class Image < Object (instance methods p-w)
mixes in Comparable
Table of Contents
instance methods
instance methods
palette?
img.palette? -> true or false
Description
Returns true if the image is
PseudoClass and has 256 unique colors or less.
Returns
true or false
Magick API
IsPaletteImage
paint_transparent
img.paint_transparent(color, opacity=TransparentOpacity,
invert=false, fuzz=img.fuzz) ->
image
Description
Changes the opacity value of all the pixels that match
color to the value specified by opacity. If invert is true, changes the
pixels that don't match color.
Arguments
- color
- Either a color name or a pixel.
- opacity
-
The new opacity value, either an
opacity value or a number between 0 and QuantumRange. The default is TransparentOpacity.
- invert
- If true, changes all the pixels that are not the target color.
- fuzz
- By default the pixel must match exactly, but you can specify a tolerance level by passing a positive value.
Returns
A new image
See also
matte_replace, Draw#matte,
transparent
Magick API
TransparentPaintImage
pixel_color
img.pixel_color(x, y[, new_color]) ->
pixel
Description
Returns the color of the pixel at x, y. Optionally, changes the color of the pixel to a new color.
If new_color is specified, pixel_color changes the image type to DirectClass if necessary.
Arguments
- x, y
- The x- and y-coordinates of the pixel.
- new_color
-
If specified, the pixel is set to this color. May be either a
color name or a Pixel.
Returns
A
Pixel having the RGB values of the specified pixel.
Example
old = image.pixel_color(20,40,"white")
Magick API
AcquireImagePixels
polaroid
img.polaroid(angle=-5.0) [ { optional arguments } ] -> image
Description
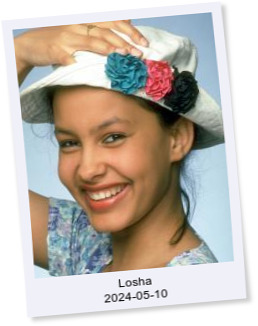
Produce an image that looks like a Polaroid® instant picture. If the image has a "Caption" property, the value is
used as a caption.
Optional arguments may be specified in a block associated with the method. These arguments control the shadow color and how the label is rendered. By
default the shadow color is gray75. To specify a different shadow color, use options.shadow_color. To specify a different border color
(that is, the color of the image border) use options.border_color. Both of these methods accept either a
color name or a Pixel argument.
The following annotate attributes control the label rendering: align,
decorate, density, encoding,
fill, font, font_family,
font_stretch, font_style,
font_weight, gravity, pointsize,
stroke, stroke_width,
text_antialias, undercolor.
img.polaroid do |options|
  options.shadow_color = "gray40"
  options.pointsize = 12
end
Arguments
- angle
- The resulting image is rotated by this amount, measured in degrees. The default is -5.0.
Example
Magick API
PolaroidImage
Notes
"Polaroid" and the other names of products of Polaroid Corporation are trademarks of Polaroid Corporation.
posterize
img.posterize(levels=4, dither=false) -> image
Description
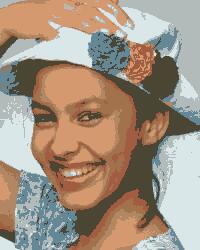
Reduces the image to a limited number of colors for a "poster" effect.
Arguments
- levels
-
Number of color levels allowed in each channel. Very low values (2, 3, or 4) have the most visible effect.
The default is 4.
- dither
- If true, dither the image. The default is false.
Returns
A new image
Example

See also
ordered_dither,
quantize
Magick API
PosterizeImage
preview
img.preview(preview) -> image
Description
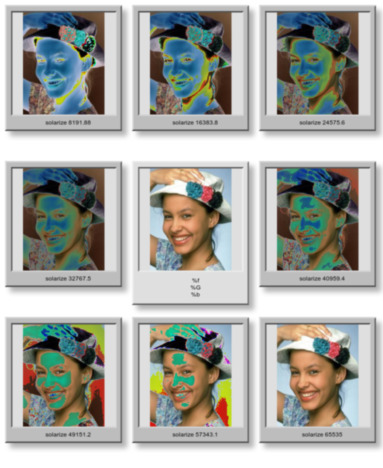
Creates an image that contains 9 small versions of the receiver image. The center image is the unchanged receiver. The other 8 images are variations
created by transforming the receiver according to the specified preview type with varying parameters.
A preview image is an easy way to "try out" a transformation method.
Arguments
One of the following PreviewType constants:
- RotatePreview
- ShearPreview
- RollPreview
- HuePreview
- SaturationPreview
- BrightnessPreview
- GammaPreview
- SpiffPreview
- DullPreview
- GrayscalePreview
- QuantizePreview
- DespecklePreview
- ReduceNoisePreview
- AddNoisePreview
- SharpenPreview
- BlurPreview
- ThresholdPreview
- EdgeDetectPreview
- SpreadPreview
- SolarizePreview
- ShadePreview
- RaisePreview
- SegmentPreview
- SwirlPreview
- ImplodePreview
- WavePreview
- OilPaintPreview
- CharcoalDrawingPreview
- JPEGPreview
Returns
A new image
Example
This half-size preview demonstrates the SolarizePreview argument.
Magick API
PreviewImage
profile!
img.profile!(name, profile) -> self
Description
Adds or removes a ICM, IPTC, or generic profile from an image.
If profile is nil, the specified profile is removed from the image. Use profile('*', nil) to remove all profiles
from the image.
Arguments
- name
- The profile name, or "*" to represent all the profiles in the image.
- profile
- The profile value, or
nil to cause the profile to be removed.
Returns
self
See also
add_profile and delete_profile perform very similar functions. However,
add_profile accepts the name of a profile file on disk instead of the profile data itself and, if the file contains more than one profile,
will load all the profiles at once.
Magick API
ProfileImage
Notes
ImageMagick does not automatically remove profiles when resizing images. If you are trying to make your JPEG thumbnail images as small as possible, use
profile! to remove any profiles from the image as well. Also see strip!
properties
img.properties [ {|name,value| block} ] -> hash
Description
If called with an associated block, properties runs the block once for each property defined for the image. The block arguments are the
property name and its value. If there is no block, properties returns a hash with one element for each property. The hash key is the
property name and the associated value is the property value.
Returns
If called without a block, returns a hash, otherwise returns
self.
See also
[ ],
[ ]=
Note
The EXIF property is not created until the first time an EXIF tag or entry number is referenced.
quantize
img.quantize(number_colors=256, colorspace=RGBColorspace,
dither=RiemersmaDitherMethod, tree_depth=0,
measure_error=false) ->
image
Description
Analyzes the colors within a reference image and chooses a fixed number of colors to represent the image. The goal of the algorithm is to minimize the
difference between the input and output image while minimizing the processing time.
Arguments
- number_colors
-
The maximum number of colors in the result image. Must be <=
QuantumRange.
- colorspace
-
The colorspace to quantize in. Color reduction, by default, takes place in the RGB color space.
Empirical evidence suggests that distances in color spaces such as YUV or YIQ correspond to perceptual color differences
more closely than do distances in RGB space. The Transparent color space behaves uniquely in that it preserves the matte channel of the image if
it exists.
- dither
-
A DitherMethod value. Set to
NoDitherMethod to disable dithering. See the documentation for the
ImageMagick -dither option
for more information.
- tree_depth
-
The tree depth to use while quantizing. The values 0 and 1 support automatic tree depth determination. The tree depth may be forced via values
ranging from 2 to 8. The ideal tree depth depends on the characteristics of the input image, and may be determined through experimentation.
See the documentation for the
ImageMagick -treedepth option
for more information.
- measure_error
- Set to
true to calculate quantization errors when quantizing the image.
Returns
A new image
Example
See the example for colorize.
See also
ordered_dither, posterize,
ImageList#quantize
Magick API
QuantizeImage
quantum_operator
img.quantum_operator(operator, rvalue,
channel=AllChannels) -> self
Description
Performs the requested integer arithmetic operation on the selected channel of the image. This method allows simple arithmetic operations on the
component values of all pixels in an image. Of course, you could also do this in Ruby using
get_pixels and store_pixels, or view, but
quantum_operator will be faster, especially for large numbers of pixels, since it does not need to convert the pixels from C to Ruby.
Arguments
- operator
-
One of the following
QuantumExpressionOperator
constants:
- AddQuantumOperator
AndQuantumOperatorDivideQuantumOperatorLShiftQuantumOperatorMaxQuantumOperatorMinQuantumOperatorMultiplyQuantumOperatorOrQuantumOperatorRShiftQuantumOperatorSubtractQuantumOperatorXorQuantumOperatorPowQuantumOperatorLogQuantumOperatorThresholdQuantumOperatorThresholdBlackQuantumOperatorThresholdWhiteQuantumOperatorGaussianNoiseQuantumOperatorImpulseNoiseQuantumOperatorLaplacianNoiseQuantumOperatorMultiplicativeNoiseQuantumOperatorPoissonNoiseQuantumOperatorUniformNoiseQuantumOperatorCosineQuantumOperatorSineQuantumOperatorAddModulusQuantumOperator
Some of these constants are not defined in older releases of ImageMagick. To see which ones are defined, enter this statement in IRB:
Magick::QuantumExpressionOperator.values {|v| puts v}
- rvalue
- a
Numeric operation rvalue.
- channel
- A ChannelType value. The default is to operate on the R, G. and B channels.
Returns
self
Example
Divide the red component of all the pixels in the image by 2:
img.quantum_operator(Magick::DivideQuantumOperator, 2, Magick::RedChannel)
See also
function_channel
The Image::View class supports operations on individual pixels and collections of pixels, as well as operations on
channels within pixels. See view, below.
Magick API
EvaluateImageChannel
radial_blur
img.radial_blur(float) -> image
radial_blur_channel
img.radial_blur_channel(float [, channel...]) -> image
Description
Applies a radial blur to the selected image channels.
Arguments
- angle
- Amount of blur, in degrees
- channel...
-
0 or more
ChannelType arguments. If no channels are specified, all the channels are blurred.
Returns
A new image
See also
radial_blur
Magick API
RadialBlurImageChannel
raise
img.raise(width=6, height=6,
raised=true) -> image
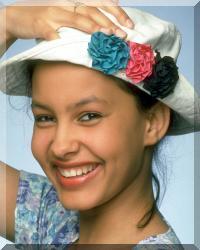
Description
Creates a simulated three-dimensional button-like effect by lightening and darkening the edges of the image.
Arguments
- width
- The width of the raised edge in pixels. The default is 6.
- height
- The height of the raised edge in pixels. The default is 6.
- raised
- If
true, the image is raised, otherwise lowered.
Returns
A new image
Example

Magick API
RaiseImage
random_threshold_channel
img.random_threshold_channel( thresholds, [channel...] ) -> image
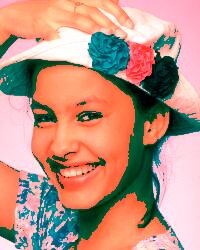
Description
Changes the value of individual pixels based on the intensity of each pixel compared to a random threshold. The result is a low-contrast, two color
image.
Arguments
- thresholds
-
A geometry string containing LOWxHIGH thresholds.
The string is in the form `XxY'. The Y value may be omitted, in which case it is assigned the value QuantumRange-X. If an % appears in the string then
the values are assumed to be percentages of QuantumRange.
If the string contains 2x2, 3x3, or 4x4, then an ordered dither of order 2, 3, or 4 will be performed instead.
A Geometry object may be used as well.
- channel...
-
0 or more
ChannelType arguments. If no channels are specified, all the channels are thresholded.
Returns
A new image
Example
geom = Magick::Geometry.new(Magick::QuantumRange/2)
random_threshold_channel(geom, Magick::RedChannel)

See also
adaptive_threshold, bilevel_channel,
threshold
Magick API
RandomThresholdImageChannel
recolor
img.recolor(color_matrix) -> image
Description
Use this method to
translate, scale, shear, or rotate image colors. Although you can use variable sized matrices, typically you use a 5×5 for an RGBA image and a
6×6 for CMYKA. Populate the last row with normalized values to translate.
Arguments
An array of Float values representing the recolor matrix.
Magick API
RecolorImage
reduce_noise
img.reduce_noise(radius) -> image
Description
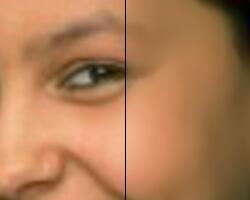
Smooths the contours of an image while still preserving edge information. The algorithm works by replacing each pixel with its neighbor closest in
value.
Arguments
- radius
-
A neighbor is defined by radius. Use a radius of 0 and
reduce_noise selects a suitable radius for you.
Returns
A new image
Example
The left side of the image has been modified by
add_noise. The right side has been filtered by reduce_noise(0).
See also
enhance,
unsharp_mask
Magick API
ReduceNoiseImage
remap
img.remap(remap_image, dither=RiemersmaDitherMethod) ->
self
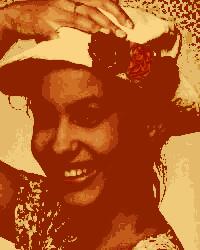
Description
Reduce the number of colors in img to the colors used by remap_image. If a dither method is specified
then the given colors are dithered over the image as necessary, otherwise the closest color (in RGB colorspace) is selected to replace that pixel in
the image.
Arguments
- remap_image
- The reference image
- dither
-
A DitherMethod value. RiemersmaDitherMethod is the default. To disable dithering specify NoDitherMethod.
Returns
self
Example

See also
ImageList#remap
Magick API
RemapImage (available in ImageMagick 6.4.3-6)
resample
img.resample(horizontal_res=72.0[, vertical_res]) -> image
Description
Resample image to specified horizontal and vertical resolution.
Resize the image so that its rendered size remains the same as the original at the specified target resolution. For example, if a 300 DPI image
renders at 3 inches by 2 inches on a 300 DPI device, when the image has been resampled to 72 DPI, it will render at 3 inches by 2 inches on a 72 DPI
device. Note that only a small number of image formats (e.g. JPEG, PNG, and TIFF) are capable of storing the image resolution. For formats which do
not support an image resolution, the original resolution of the image must be specified via
the density attribute
prior to specifying the resample resolution.
Arguments
- horizontal_res
- the target horizontal resolution. The default is 72.0.
- vertical_res
-
the target vertical resolution. The default is
horizontal_res.
resize
img.resize(new_width, new_height, filter=LanczosFilter, support=1.0) -> image
img.resize(scale_factor) -> image
Description
Changes the size of the receiver to the specified dimensions.
Arguments
You can specify the new size in two ways. Either specify the new width and height explicitly, or specify a scale factor, a number that
represents the percentage change.
Use the change_geometry method to resize an image with constraints such as "maintain the current proportions."
- new_width, new_height
- The desired width and height.
- filter
-
The filter to use when resizing. If you do not specify a filter argument, resize uses the value of the
receiver's filter attribute.
Most of the filters are FIR (finite impulse response), however, Bessel, Gaussian, and Sinc are IIR (infinite impulse response). Bessel and Sinc are
windowed (brought down to zero) with the Blackman filter.
- support
- Values > 1 increase the blurriness. Values < 1 increase the sharpness.
- scale_factor
-
You can use this argument instead of specifying the desired width and height. The percentage size change. For example, 1.25 makes the new image 125%
of the size of the receiver. The scale factor 0.5 makes the new image 50% of the size of the receiver.
Returns
A new image
See also
change_geometry, resize!, magnify,
minify, sample, scale, thumbnail
Magick API
ResizeImage
resize!
img.resize!(new_width, new_height, filter=LanczosFilter,
support=1.0) -> self
img.resize!(scale_factor) -> self
Description
In-place form of resize.
Returns
self
resize_to_fill
img.resize_to_fill(width [, height [,
gravity=CenterGravity]]) ->
image
Description
A convenience method. Resize the image to fit within the specified dimensions while retaining the aspect ratio of the original image. If necessary, crop
the image in the larger dimension.
Arguments
- width
- The width of the resulting image in pixels
- height
- (Optional) The height of the resulting image in pixels. If omitted, defaults to width.
- gravity
-
Use this argument to specify which portion of the image to retain when cropping. The value can be any
GravityType value. The effect is the same as the gravity argument to the
crop method. The default is CenterGravity.
Returns
A new image
Example
In this example, some rows have been cropped from the top and bottom to produce a square thumbnail from a rectangular image without distorting the
image.


See also
crop, resize,
resize_to_fit
Notes
crop_resized is an alias for this method.
resize_to_fill!
img.resize_to_fill!(width [, height [,
gravity=CenterGravity]]) ->
self
resize_to_fit
img.resize_to_fit(new_width [, new_height]) -> image
Description
A convenience method. Resize the image to fit within the specified dimensions while retaining the original aspect ratio. The image may be shorter or
narrower than specified in the smaller dimension but will not be larger than the specified values.
Arguments
- new_width
- The maximum width of the resized image.
- new_height
- (Optional) The maximum height of the resized image. If omitted it defaults to the value of new_width.
Returns
A new image
Example
Compare the result of this example to the result of the
resize_to_fill example above.


See also
resize,
resize_to_fill
resize_to_fit!
img.resize_to_fit!(new_width [, new_height]) -> self
roll
img.roll(x_offset, y_offset) -> image
Description
Offsets an image as defined by x_offset and y_offset.
Arguments
- x_offset
- The number of columns to offset the image.
- y_offset
- The number of rows to offset the image.
Returns
A new image
Example
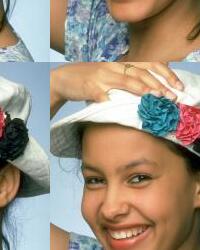
This image has been offset 25% in both directions.

Magick API
RollImage
rotate
img.rotate(amount [, qualifier]) -> image
Description
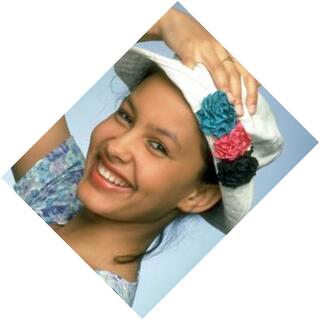
Rotate the receiver by the specified angle. Positive angles rotate clockwise while negative angles rotate counter-clockwise. New pixels introduced by
the rotation are the same color as the current
background_color. Set the background color to "none" to make the new pixels transparent black.
Arguments
- amount
- The number of degrees to rotate the image.
- qualifier
-
If present, either ">" or "<". If ">", rotates the image only if the image's width exceeds its height. If "<" rotates the image only if
its height exceeds its width. If this argument is omitted the image is always rotated.
Returns
A new image, or nil if the image was not rotated because it did not meet the qualification specified by the second argument.
Example


See also
affine_transform,
shear
Magick API
RotateImage
rotate!
img.rotate!(amount [, qualifier]) -> self
Description
In-place form of rotate.
Returns
self, or nil if the image was not rotated because it did not meet the qualification specified by the second argument.
sample
img.sample(new_width, new_height) -> image
img.sample(scale_factor) -> image
Description
Scales an image to the desired dimensions with pixel sampling. Unlike other scaling methods, this method does not introduce any additional color into
the scaled image.
Arguments
- new_width, new_height
- The desired width and height.
- scale_factor
-
You can use this argument instead of specifying the desired width and height. The percentage size change. For example, 1.25 makes the new image 125%
of the size of the receiver. The scale factor 0.5 makes the new image 50% of the size of the receiver.
Returns
A new image
See also
sample!, magnify, minify, resize,
scale, thumbnail
Magick API
SampleImage
sample!
img.sample!(new_width, new_height) -> self
img.sample!(scale_factor) -> self
Description
In-place form of sample.
Returns
self
scale
img.scale(new_width, new_height) -> image
img.scale(scale_factor) -> image
Description
Changes the size of an image to the given dimensions.
Arguments
- new_width, new_height
- The desired width and height.
- scale_factor
-
You can use this argument instead of specifying the desired width and height. The percentage size change. For example, 1.25 makes the new image 125%
of the size of the receiver. The scale factor 0.5 makes the new image 50% of the size of the receiver.
Returns
A new image
See also
scale!, magnify, minify, resize,
sample, thumbnail
Magick API
ScaleImage
scale!
img.scale!(new_width, new_height) -> self
img.scale!(scale_factor) -> self
Description
In-place form of scale.
Returns
self
segment
img.segment(colorspace=RGBColorspace, cluster_threshold=1.0,
smoothing_threshold=1.5, verbose=false) ->
image
Description
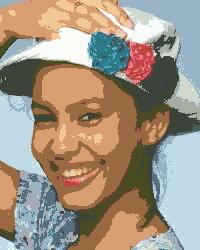
Segments an image by analyzing the histograms of the color components and identifying units that are homogeneous with the fuzzy c-means technique.
Arguments
- colorspace
-
A
ColorspaceType
value.
Empirical evidence suggests that distances in YUV or YIQ correspond to perceptual color differences more closely than do distances in RGB space.
The image is then returned to RGB colorspace after color reduction.
- cluster_threshold
- The number of pixels in each cluster must exceed the the cluster threshold to be considered valid.
- smoothing_threshold
-
The
smoothing threshold eliminates noise in the second derivative of the histogram. As the value is increased, you can expect a smoother second
derivative.
- verbose
- If
true, segment prints detailed information about the identified classes.
Returns
A new image
Example
img.segment(YUVColorspace, 0.4, 0.4)

Magick API
SegmentImage
selective_blur_channel
img.selective_blur_channel(radius, sigma,
threshold[, channel...]) -> image
Description
Selectively blur pixels within a contrast threshold.
Arguments
- radius, sigma
- Use a Gaussian operator of the given radius and standard deviation (sigma).
- threshold
- Threshold level represented as a percentage of the quantum range. Either a floating-point number or a string in the form "NN%".
- channel...
-
The channels to blur. 0 or more
ChannelType arguments. If no channels are specified, the default is the red, green, and blue channels.
Returns
A new image
Example
img2 = img.selective_blur_channel(0, 1, '10%')
See also
blur_channel, blur_image,
gaussian_blur_channel, motion_blur,
radial_blur
Magick API
SelectiveBlurImageChannel (available in ImageMagick 6.5.0-3)
separate
Image.separate(channel...) ->
imagelist
Description
Constructs a grayscale image for each channel specified.
Arguments
0 or more
ChannelType arguments. If no channels are specified, constructs an image for each of the red, green, and blue
channels.
Returns
A new imagelist containing the new images.
See also
channel
Notes
If the image does not have an opacity channel an OpacityChannel argument is ignored.
Magick API
SeparateImages
sepiatone
img.sepiatone(threshold=QuantumRange) -> image
Description
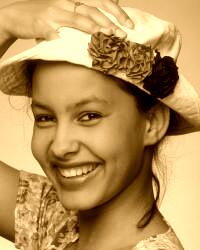
Applies a special effect to the image, similar to the effect achieved in a photo darkroom by sepia toning.
Arguments
- threshold
-
Threshold ranges from 0 to QuantumRange and is a measure of the extent of the sepia toning. A threshold of 80% is a good
starting point for a reasonable tone. The default is QuantumRange.
Returns
A new image.
Example

See also
You can get more control by using
colorize.
Magick API
SepiaToneImage
set_channel_depth
img.set_channel_depth(channel, depth) -> self
Description
Sets the depth of the image channel.
Arguments
- channel
- A ChannelType value
- depth
-
The desired depth (must be no greater than
QuantumDepth)
Returns
self
See also
channel_depth
Magick API
SetImageChannelDepth
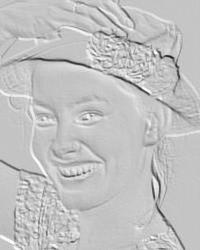
shade
img.shade(shading=false, azimuth=30,
elevation=30) -> image
Description
Shines a distant light on an image to create a three-dimensional effect. You control the positioning of the light with
azimuth and elevation; azimuth is measured in degrees off the x axis and
elevation is measured in pixels above the Z axis.
Arguments
- shading
- If
true, shade shades the intensity of each pixel.
- azimuth, elevation
-
The light source direction. The azimuth is measured in degrees. 0° is at 9 o'clock. Increasing values move the light source counter-clockwise.
Returns
A new image
Example
img.shade(true, 50, 50)

Magick API
ShadeImage
shadow
img.shadow(x_offset=4, y_offset=4, sigma=4.0,
opacity=1.0) -> image
Description
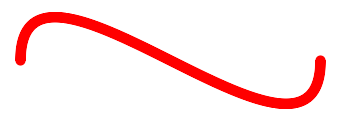
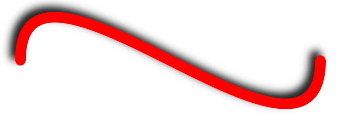
Draws the shadow of opaque parts of the image. This method only works when the image has opaque parts and transparent parts. Note that the resulting image
is just the shadow. You must composite the original image over the shadow to produce the shadowed results.
Arguments
- x_offset
- The shadow x-offset
- y_offset
- The shadow y-offset
- sigma
-
The standard deviation of the Gaussian operator used to produce the shadow. The higher the number, the "blurrier" the shadow, but the longer it takes
to produce the shadow. Must be > 0.0.
- opacity
-
The percent opacity of the shadow. May be either a number between 0.1 and 1.0, or a string in the form "NN%" between "1%" and "100%". If the
percentage is greater than 100 it is reduced to 100.
Returns
A new image
Example

Magick API
ShadowImage
Notes
The shadow image is 2×sigma pixels larger on a side than the original image, as can be seen in the example above.
sharpen
img.sharpen(radius=0.0, sigma=1.0) -> image
Description
Sharpens an image. We convolve the image with a Gaussian operator of the given radius and standard deviation (sigma). For reasonable results, radius should be larger than sigma. Use a radius of 0 and
sharpen selects a suitable radius for you.
Arguments
The radius and standard deviation of the Gaussian operator.
Returns
A new image
Magick API
SharpenImage
See also
virtual_pixel_method
sharpen_channel
img.sharpen_channel( radius, sigma [,channel...] )
-> image
Description
Sharpens one or more image channels. We convolve the image with a Gaussian operator of the given radius and standard deviation (sigma) . For reasonable results, radius should be larger than sigma. Use a radius of 0 and
sharpen_channel selects a suitable radius for you.
Arguments
- radius, sigma
- The radius and standard deviation of the Gaussian operator.
- channel...
-
0 or more
ChannelType arguments. If no channels are specified, all the channels are sharpened.
Returns
A new image
See also
sharpen
Magick API
SharpenImageChannel
shave
img.shave(width, height) -> image
Description
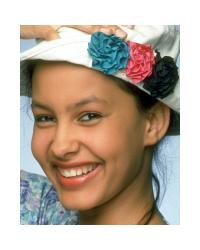
Removes pixels from the edges of the image, leaving the center rectangle.
Arguments
- width
- The number of pixels to remove from each side of the receiver, not to exceed half the original width.
- height
- The number of pixels to remove from the top and bottom of the receiver, not to exceed half the original height.
Returns
A new image
Example

See also
shave!, crop
Magick API
ShaveImage
shave!
img.shave!(width, height) -> self
Description
In-place form of shave.
Returns
self
shear
img.shear(x_shear, y_shear) -> image
Description
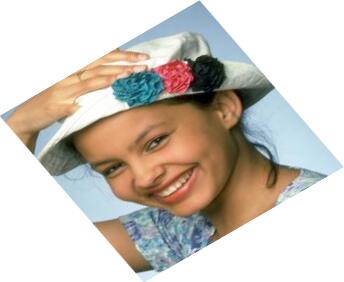
Shearing slides one edge of an image along the X or Y axis, creating a parallelogram. An X direction shear slides an edge along the X axis, while a Y
direction shear slides an edge along the Y axis. The amount of the shear is controlled by a shear angle. For X direction shears,
x_shear is measured relative to the Y axis, and similarly, for Y direction shears y_shear is measured
relative to the X axis. Empty triangles left over from shearing the image are filled with the background color.
Arguments
The X and Y shear angles, measured in degrees. These values must not be 180.0. If either value is 0, no shearing will occur.
Returns
A new image
Example


See also
affine_transform,
rotate
Magick API
ShearImage
sigmoidal_contrast_channel
img.sigmoidal_contrast_channel(contrast=3.0, midpoint=50.0,
sharpen=false[,channel...]) -> image
Description
Adjusts the contrast of an image channel with a non-linear sigmoidal contrast algorithm. Increases the contrast of the image using a sigmoidal transfer
function without saturating highlights or shadows.
Arguments
- contrast
- indicates how much to increase the contrast (0 is none; 3 is typical; 20 is pushing it)
- midpoint
-
indicates where midtones fall in the resultant image (0 is white; 50% is middle-gray; 100% is black).
Note that "50%" means "50% of the quantum range." This argument is a number between 0 and QuantumRange. To specify "50%" use
QuantumRange * 0.50.
- sharpen
- Set sharpen to
true to increase the image contrast otherwise the contrast is reduced.
- channel...
-
0 or more
ChannelType arguments. If no channels are specified, all the channels are adjusted.
Returns
A new image
See also
contrast
Magick API
SigmoidalContrastImageChannel
signature
img.signature -> string
Description
Computes a message digest from an image pixel stream with an implementation of the NIST SHA-256 Message Digest algorithm. This signature uniquely
identifies the image and is convenient for determining if an image has been modified or whether two images are identical.
ImageMagick adds the computed signature to the image's properties.
Returns
The signature as a 64-character string.
Example
img = Magick::Image.read('ex/images/Flower_Hat.jpg').first #=> ex/images/Flower_Hat.jpg JPEG 200x250 DirectClass 8-bit 9761b
img.properties #=> {"comment"=>"File written by Adobe Photoshop\250 4.0"}
img.signature  #=> "485e01ecba1a1f47924d67b887cb07b474f695841733796dfa3c2876965c7e8b"
img.properties
#=> {"signature"=>"485e01ecba1a1f47924d67b887cb07b474f695841733796dfa3c2876965c7e8b",
#   "comment"=>"File written by Adobe Photoshop\250 4.0"}
See also
<=>,
difference
Magick API
SignatureImage
sketch
img.sketch(radius=0.0, sigma=1.0, angle=0.0) ->
image
Description
Simulates a pencil sketch. For best results start with a grayscale image.
Arguments
- radius, sigma
- The radius and sigma of the Gaussian operator
- angle
- The angle toward which the image is sketched.
Returns
A new image
Example


Magick API
SketchImage
solarize
img.solarize(threshold=50) -> image
Description
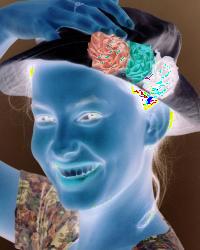
Applies a special effect to the image similar to the effect achieved in a photo darkroom by selectively exposing areas of photo sensitive paper to
light.
Arguments
Ranges from 0 to QuantumRange and is a measure of the extent of the solarization.
The default is 50.
Returns
A new image
Example

Magick API
SolarizeImage
sparse_color
img.sparse_color(method, x1, y1,
color1[, x2, y2, color2...][,
channel...]) -> image
Description
Fills the image with the specified color or colors, starting at the x,y
coordinates associated with the color and using the specified interpolation method.
For more information about this method see the ImageMagick documentation for the -sparse-color option. Also see
Sparse Points of Color
at
Examples of ImageMagick Usage.
Arguments
- method
-
One of the following interpolation methods:
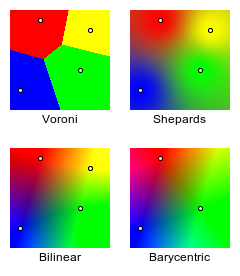
- BarycentricColorInterpolate
-
Three point triangle of color given 3 points. Giving only 2 points will form a linear gradient between those points. Gradient is however not
restricted to just the triangle or line.
- BilinearColorInterpolate
- Like barycentric but for 4 points. Less than 4 points fall back to barycentric.
- ShepardsColorInterpolate
- Colors points basied on the ratio of inverse distance squared. Generating spots of color in a sea of the average of colors.
- VoronoiColorInterpolate
- Simply map each pixel to the to nearest color point given. The result are polygonal 'cells' of solid color.
- xn, yn, colorn
-
One or more x,y, color triplets. X and
y are floating-point values. Color can be either a
color name or a pixel.
- channel...
-
0 or more
ChannelType arguments. If no channels are specified then DefaultChannels is used.
Example
Returns
A new image
Magick API
SparseColorImage (available in 6.4.3)
splice
img.splice(x, y, width,
height[, color]) ->
image
Description
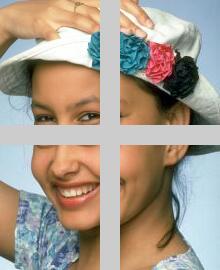
Splice a solid color into the image as defined by the x, y, width, and height arguments. This method
is the opposite of chop.
Arguments
- x, y, width, height
- Describe the rectangle to be spliced.
- color
-
The color to be spliced. Either a
color name or a pixel. If omitted, uses the image's background color.
Returns
A new image
Example


See also
color_fill_to_border, color_floodfill,
color_reset!, erase!,
opaque
Magick API
SpliceImage
spread
img.spread(radius=3) -> image
Description
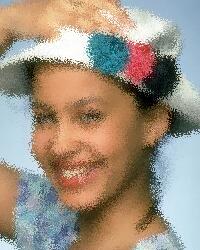
Randomly displaces each pixel in a block defined by the
radius parameter.
Returns
A new image
Example

Magick API
SpreadImage
stegano
img.stegano(watermark, offset) -> image
Description
Hides a digital watermark in the receiver. You can retrieve the watermark by reading the file with the stegano: prefix, thereby proving the
authenticity of the file.
The watermarked image must be saved in a lossless RGB format such as MIFF, or PNG. You cannot save a watermarked image in a lossy format such as JPEG or
a pseudocolor format such as GIF. Once written, the file must not be modified or processed in any way.
Arguments
- watermark
-
An image or imagelist to be used as the watermark. The watermark must be grayscale and should be substantially smaller than the receiver. The recovery
time is proportional to the size of the watermark.
- offset
-
The starting position within the receiver at which the watermark will be hidden. When you retrieve the watermark from the file, you must supply this
value, along with the width and height of the watermark, in the size optional parameter to the
read method.
Returns
A copy of the image containing the embedded watermark.
Example

Magick API
SteganoImage
See also
watermark
stereo
img.stereo(offset_image) -> image
Description
Combines two images and produces a single image that is the composite of a left and right image of a stereo pair. Special red-green stereo glasses are
required to view this effect.
Arguments
Another image or imagelist. If the argument is an imagelist, uses the current image.
Returns
A new image
Magick API
StereoImage
store_pixels
img.store_pixels(x, y, columns,
rows, pixels) ->
image
Description
Replace the pixels in the specified rectangle with the pixels in the
pixels array.
Arguments
- x, y
- The x- and y-offset of the rectangle to be replaced.
- columns, rows
- The number of rows and columns in the rectangle.
- pixels
-
An array of pixels. The number of pixels in the array must be the same as the number of pixels in the rectangle, that
is,
rows*columns.
Returns
The image, with the rectangle suitably altered.
Example

Also see the example for
get_pixels.
See also
constitute, get_pixels,
view
Magick API
SetImagePixels, SyncImagePixels
strip!
img.strip! -> self
Description
Strips an image of all profiles and comments.
Returns
self
Magick API
StripImage
swirl
img.swirl(degrees) -> image
Description
Swirls the pixels about the center of the image, where degrees indicates the sweep of the arc through which each pixel is moved. You get a more dramatic
effect as the degrees move from 1 to 360.
Arguments
The number of degrees to swirl the image.
Returns
A new image
Example
This example is an animated image. Mouse over the image to start the animation.


Magick API
SwirlImage
sync_profiles
img.sync_profiles -> true or
false
Description
Synchronizes image properties with the image profiles.
Returns
True if everything went okay, false if there was a problem with the profile.
Notes
Currently we only support updating the EXIF resolution and orientation.
Magick API
SyncImageProfiles
texture_fill_to_border
img.texture_fill_to_border(x, y, texture) ->
image
Description
Replaces the target pixel at x, y and its neighbors that are not the border color with copies of the
texture image. Use the fuzz attribute to specify how closely a pixel must match the border
color.
Arguments
- x, y
- The x- and y-offset of the target pixel.
- texture
- An image or imagelist. If an imagelist, uses the current image.
Returns
A new image
Example
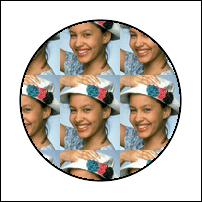
In this example the target is the pixel in the center of the image. The texture - in this case a picture of a girl in a flowered hat - replaces this
pixel and its neighbors until reaching a black pixel. Mouse over the image to see the original image. Notice the plum-colored circles are replaced as
well. Compare this result with the result of
texture_floodfill, below.

See also
color_fill_to_border,
matte_fill_to_border
Magick API
ColorFloodfillImage
texture_floodfill
img.texture_floodfill(x, y, texture) ->
image
Description
Replaces the target pixel at x, y and its neighbors that are the same color with the
texture image. By default, the neighbor pixels must be exactly the same color as the target pixel. Use the
fuzz attribute to specify how much difference is acceptable.
Arguments
- x, y
- The x- and y-offset of the target pixel.
- texture
- An image or imagelist. If an imagelist, uses the current image.
Returns
A new image
Example
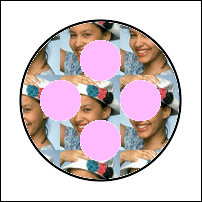
In this example the target is the pixel in the center of the image. The texture - in this case a picture of a girl in a flowered hat - replaces this
pixel and its same-colored neighbors. Mouse over the image to see the original image. Notice the plum-colored circles are not replaced. Compare this
result with the result of
texture_fill_to_border, above.

See also
color_floodfill,
matte_floodfill
Magick API
ColorFloodfillImage
threshold
img.threshold(threshold) -> image
Description
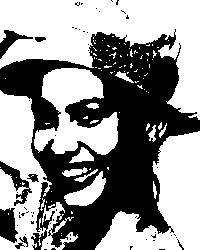
Changes the value of individual pixels based on the intensity of each pixel compared to threshold. The result is a
high-contrast, two color image.
Arguments
A value between 0 and QuantumRange.
Returns
A new image
Example
img.threshold(Magick::QuantumRange * 0.55)

See also
adaptive_threshold, bilevel_channel,
random_threshold_channel
Magick API
ThresholdImage
thumbnail
img.thumbnail(new_width, new_height) -> image
img.thumbnail(scale_factor) -> image
Description
The thumbnail method is a fast resizing method suitable for use when the size of the resulting image is < 10% of the original.
Arguments
You can call thumbnail with either the new width and height or the scale factor.
- new_width, new_height
- The desired width and height in pixels.
- scale_factor
-
The desired size represented as a floating-point number. For example, to make a thumbnail that is 9.5% of the size of the original image, use
0.095.
Returns
A new image
Example
img = Magick::Image.read("images/Cheetah.jpg").first
thumbnail = img.thumbnail(img.columns * 0.09, img.rows * 0.09)
See also
minify, resize, sample, scale
Magick API
ThumbnailImage
thumbnail!
img.thumbnail!(new_width, new_height) -> self
img.thumbnail!(scale_factor) -> self
Description
In-place form of thumbnail.
Returns
self
to_blob
img.to_blob [ { optional arguments } ]-> string
Description
Creates a Binary Large OBject, a direct-to-memory version of the image. The
from_blob method constructs an image from a BLOB created by this method.
Arguments
No required arguments, however you can specify the image format (such as JPEG, PNG, etc.) and depth by calling the
format and depth attributes, as well as other
Image::Info attributes as appropriate, in a block associated with the method.
Returns
A string containing the image data represented as a BLOB.
Example

See also
from_blob
Magick API
ImageToBlob
to_color
img.to_color(pixel) -> string
Description
Returns the color name for a pixel. Unlike the
Pixel#to_color method, to_color uses the depth attribute of the image to determine the color name.
Arguments
A Pixel object.
Returns
A color name.
Example
img = Magick::Image.read('ex/images/Flower_Hat.jpg').first #=> ex/images/Flower_Hat.jpg JPEG 200x250 DirectClass 8-bit 9761b
pixel = img.pixel_color(img.columns/2, img.rows/2)         #=> #<struct Pixel red=216, green=147, blue=106, opacity=0>
img.to_color(pixel)                                        #=> "#D8936A"
See also
Pixel#to_color
Magick API
QueryColorname
transparent
img.transparent(color, opacity=TransparentOpacity) ->
image
Description
Changes the opacity value of all the pixels that match
color to the value specified by opacity. By default the pixel must match exactly, but you can specify
a tolerance level by setting the fuzz attribute on the image.
Arguments
- color
- Either a color name or a pixel.
- opacity
-
The new opacity value, either an
opacity value or a number between 0 and QuantumRange. The default is TransparentOpacity.
Returns
A new image
Example
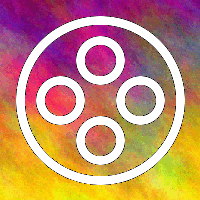
Mouse over the image to see the original. In this example, all the black pixels are made transparent. The resulting image has been composited over a
plasma background, which shows through the transparent pixels.

See also
matte_replace, Draw#matte, paint_transparent,
transparent_chroma
Magick API
TransparentPaintImage
transparent_chroma
img.transparent_chroma(low, high,
opacity=TransparentOpacity, invert=false) -> image
Description
Changes the opacity value associated with any pixel between
low and high to the value defined by opacity.
As there is one fuzz value for the all the channels, the
transparent method is not suitable for the operations like chroma, where the tolerance for similarity of two color components
(RGB) can be different, Thus we define this method take two target pixels (one low and one high) and all the pixels of an image which are lying between
these two pixels are made transparent.
Arguments
- low, high
- The low and high ends of the pixel range
- opacity
- The desired opacity. The default value is transparent.
- invert
-
If true, all pixels outside the range are set to
opacity.
Returns
A new image
Magick API
TransparentPaintImageChroma (available in ImageMagick 6.4.5-6)
transpose
img.transpose -> image
Description
Creates a horizontal mirror image by reflecting the pixels around the central y-axis while rotating them by 90 degrees.
Returns
A new image
Example


See also
flip, flop, rotate,
transpose!,
transverse
Magick API
TransposeImage
transpose!
img.transpose! -> self
Description
In-place form of transpose.
Returns
self
transverse
img.transverse -> image
Description
Creates a vertical mirror image by reflecting the pixels around the central x-axis while rotating them by 270 degrees
Returns
A new image
Example


See also
flip, flop, rotate,
transpose,
transverse!
Magick API
TransposeImage
transverse!
img.transverse! -> self
Description
In-place form of transverse.
Returns
self
trim
img.trim(reset=false) -> image
Description
Removes the edges that are exactly the same color as the corner pixels. Use the fuzz attribute to make
trim remove edges that are nearly the same color as the corner pixels.
Arguments
The trim method retains the offset information in the cropped image. This may cause the image to appear to be surrounded by blank or black space when
viewed with an external viewer. This only occurs when the image is saved in a format (such as GIF) that saves offset information. To reset the offset
data, use true as the argument to trim. See also
crop.
Returns
A new image
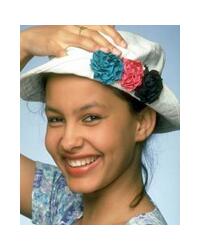
Example

See also
crop
Magick API
CropImage
trim!
img.trim!(reset=false) -> self
In-place form of trim.
Returns
self
unique_colors
img.unique_colors -> image
Description
Constructs a new image with one pixel for each unique color in the image. The new image has 1 row. The row has 1 column for each unique pixel in the
image.
Returns
A new image
Magick API
UniqueImageColors
unsharp_mask
img.unsharp_mask(radius=0.0, sigma=1.0, amount=1.0,
threshold=0.05) -> image
Description
Sharpens an image. We convolve the image with a Gaussian operator of the given radius and standard deviation (sigma). For reasonable results, radius should be larger than sigma. Use a radius of 0 and
unsharp_mask selects a suitable radius for you.
Arguments
All arguments are optional.
- radius
- The radius of the Gaussian operator. The default is 0.0.
- sigma
- The standard deviation of the Gaussian operator. A good starting value is 1.0, which is the default.
- amount
-
The percentage of the blurred image to be added to the receiver, specified as a fraction between 0 and 1.0. A good starting value is 1.0, which is the
default.
- threshold
- The threshold needed to apply the amount, specified as a fraction between 0 and 1.0. A good starting value is 0.05, which is the default.
Returns
A new image
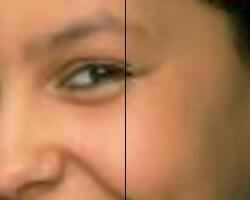
Example
See also
enhance, median_filter, reduce_noise,
unsharp_mask_channel
Magick API
UnsharpMaskImage
unsharp_mask_channel
img.unsharp_mask_channel(radius=0.0, sigma=1.0,
amount=1.0, threshold=0.05 [,channel...]) -> image
Description
Sharpens an image. We convolve the image with a Gaussian operator of the given radius and standard deviation (sigma). For reasonable results, radius should be larger than sigma. Use a radius of 0 and
unsharp_mask_channel selects a suitable radius for you.
Only the specified channels are sharpened.
Arguments
All arguments are optional.
- radius
- The radius of the Gaussian operator. The default is 0.0.
- sigma
- The standard deviation of the Gaussian operator. A good starting value is 1.0, which is the default.
- amount
-
The percentage of the blurred image to be added to the receiver, specified as a fraction between 0 and 1.0. A good starting value is 1.0, which is the
default.
- threshold
- The threshold needed to apply the amount, specified as a fraction between 0 and 1.0. A good starting value is 0.05, which is the default.
- channel...
-
0 or more
ChannelType arguments. If no channels are specified, all the channels are sharpened. This is the equivalent
of unsharp_mask.
Returns
A new image
See also
enhance, median_filter, reduce_noise,
unsharp_mask
Magick API
UnsharpMaskImageChannel
view
img.view(x, y, width,
height) -> aView
img.view(x, y, width,
height) { |view| block } -> nil
Description
View is a convenience method that supports getting and setting individual image pixels by
[i][j] coordinates. With no associated
block,
view returns an
Image::View object. If the optional code block is given, it will be passed the
Image::View object as an argument. The
sync method will be called automatically when the block
terminates. In this case,
view returns
nil.
Arguments
- x, y
-
The offset of the view from the top-left corner of the image. Within the view, pixels are relative to the top-left corner of the view,
not the image.
- width, height
- The width and height of the view. The view may not extend past the boundaries of img.
Returns
If the optional code block is present, view returns nil. If it is not present, view returns an
Image::View object.
See
Image::View
Examples
The example image below has been scaled 500% for clarity.
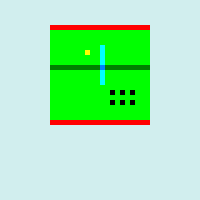
img = Magick::Image.new(40, 40) { |options| options.background_color = 'lightcyan2'}

# The view is 400 pixels square, starting at
# column 10, row 5 from the top of the image.
img.view( 10, 5, 20, 20) do |view|

  # Set all the pixels in the view to green.
  view[][] = Pixel.new(0, Magick::QuantumRange)

  # Change the top and bottom rows to red.
  view[0][] = 'red'
  view[-1,1][] = 'red'

  # Set 6 pixels to black.
  view[[13,15]][[12,14,16]] = 'black'

  # Set 1 pixel to yellow.
  view[5][7] = 'yellow'

  # Change the green channel of all the
  # pixels on row 8.
  view[8][].green = Magick::QuantumRange/2

  # Change the blue channel of 8 pixels
  # on column 10.
  view[4,8][10].blue = Magick::QuantumRange
end
See also
pixel_color, get_pixels,
store_pixels
Notes
The view method introduces a relatively high level of overhead to pixel manipulation compared to methods that use the ImageMagick API to
identify and change pixels. I recommend that you use view only when the number of pixels identified in the view is fairly small (a few
thousand to a few hundred thousand, depending on your patience and the speed of your computer) and you need this degree of control.
vignette
img.vignette(x, y, radius=0.0,
sigma=10.0) ->
image
Description
Gradually shades the edges of the image by transforming the pixels into the background color.
Arguments
- x
-
Influences the amount of background color in the horizontal dimension. Larger values of x make the vignette narrower. This
argument should be positive and less than image.columns / 2. This argument is optional. If omitted, the default value is 0.10 *
img.columns.
- y
-
Influences the amount of background color in the vertical dimension. Larger values of y make the vignette shorter. This
argument should be positive and less than image.rows / 2. This argument is optional. If omitted, the default value is 0.10 *
img.rows.
- radius, sigma
-
Controls the amount of blurring. Larger values of
sigma increase the blurring at the expense of increased execution time. In general, radius should be
larger than sigma, although if radius is 0 then ImageMagick will choose a suitable value.
Sigma must be non-zero. Choose a very small value for sigma to produce a "hard" edge.
Returns
A new image
Example


Magick API
VignetteImage
Notes
The image produced by vignette is very similar to the image produced by RMagick's vignette.rb example script. However, the example script
gives you more control over the size, shape, and background color of the vignette.
watermark
img.watermark(mark, lightness=1.0, saturation=1.0,
x_offset=0, y_offset=0) -> image
img.watermark(mark, lightness=1.0, saturation=1.0,
gravity, x_offset=0, y_offset=0) -> image
Description
Composites a watermark image on the target image using the
Modulate
composite operator. This composite operation operates in the HSL colorspace and combines part of the lightness, part of the saturation, and all of the
hue of each pixel in the watermark with the corresponding pixel in the target image
Arguments
- mark
- The watermark image. Either an imagelist or an image. If an imagelist, uses the current image.
- lightness
-
The fraction of the lightness component of the watermark pixels to be composited onto the target image. Must be a non-negative number or a string in
the form "NN%". If lightness is a number it is interpreted as a percentage. Both 0.25 and "25%" mean 25%. The default is 100%.
- saturation
-
The fraction of the saturation component of the watermark pixels to be composited onto the target image. Must be a non-negative number or a string in
the form "NN%". If lightness is a number it is interpreted as a percentage. Both 0.25 and "25%" mean 25%. The default is 100%.
- x_offset
- The offset of the watermark, measured from the left-hand side of the target image. The default is 0.
- y_offset
- The offset of the watermark, measured from the top of the target image. The default is 0.
Watermark can be called with a gravity argument or without. When a gravity argument is specified but
the x- and y-offsets are omitted, the watermark is positioned based on the value of the
gravity argument:
- NorthWestGravity
- The watermark abuts the top and left sides of the image.
- NorthGravity
- The watermark is centered left-to-right and abuts the top of the image.
- NorthEastGravity
- The watermark abuts the top and right sides of the image.
- EastGravity
- The watermark is centered top-to-bottom and abuts the right side of the image.
- SouthEastGravity
- The watermark abuts the bottom and right sides of the image.
- SouthGravity
- The watermark is centered left-to-right and abuts the bottom of the image.
- SouthWestGravity
- The watermark abuts the bottom and left sides of the image.
- WestGravity
- The watermark is centered top-to-bottom and abuts the left side of the image.
- CenterGravity
- The watermark is centered left-to-right and top-to-bottom.
When the gravity argument is present and the x-offset (and optionally the
y-offset) is present, the x- and y-offset are measured from the right and/or
bottom edges of the target image based on the value of gravity. If the argument is NorthEastGravity, EastGravity, or
SouthEastGravity, the x-offset is measured from the right side of the image. If the argument is SouthEastGravity, SouthGravity,
or SouthWestGravity, the y-offset is measured from the bottom of the image. All other values are ignored and the
x- and y-offset are measured from the upper-left corner of the image.
Returns
A new image
Example
See
"Water Marking".


See also
composite,
stegano
wave
img.wave(amplitude=25.0, wavelength=150.0) -> image
Description
Creates a "ripple" effect in the image by shifting the pixels vertically along a sine wave whose amplitude and
wavelength is specified by the given parameters.
Returns
A new image
Example


Magick API
WaveImage
See also
virtual_pixel_method
wet_floor
img.wet_floor(initial=0.5, rate=1.0) -> image
Description
Creates a
"wet floor"
reflection. The reflection is an inverted copy of the image that changes from partially transparent to entirely transparent. By default only the bottom
third of the image appears in the reflection.
Note that the output image is just the reflection. This makes it easy to apply further transformations to the reflection before combining it with the
original image.
Arguments
- initial
-
A value between 0.0 and 1.0 that specifies the initial percentage of transparency. Higher values cause the top of the reflection to be more
transparent, lower values less transparent. The default is 0.5, which means that the top of the reflection is 50% transparent.
- rate
-
A non-negative value that specifies how rapidly the reflection transitions from the initial level of transparency to entirely transparent. The default
value is 1.0, which means that the transition occurs in 1/3 the image height. Values greater than 1.0 speed up the transition (the reflection will
have fewer rows), values lower than 1.0 slow down the transition (the reflection will have more rows). A value of 0.0 means that the level of
transparency will not change.
Returns
A new image
Example
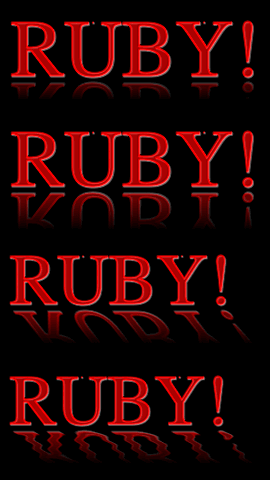
Here are four examples of wet_floor. The top image shows the result of appending the default reflection to the original image. The second
image shows the result of decreasing the initial transparency to 0.25 and using 0.5 as the rate argument. The third image uses
the same reflection as the second image but has a slant added. The bottom image is the same as the third image but with a ripple effect.
white_threshold
img.white_threshold(red_channel [, green_channel[,
blue_channel[, opacity_channel]]]) -> image
Description
Forces all pixels above the threshold into white while leaving all pixels below the threshold unchanged.
Arguments
Each channel argument is a number between 0 and QuantumRange. All arguments except the first may be omitted. If the
green_channel or blue_channel argument is omitted, the default value is the
red_channel value. If the opacity_channel argument is omitted, the default value is
OpaqueOpacity.
Returns
A new image
See also
black_threshold,
bilevel_channel
Magick API
WhiteThresholdImage
write
img.write(filename) [ { optional arguments } ] -> self
img.write(file) [ { optional arguments } ] -> self
Description
Writes the image to the specified file. ImageMagick determines image format from the prefix or extension.
If the argument is an open file, ImageMagick will write the image in its current format. You can force a different format by setting the image's
format attribute.
Arguments
A file name or open file object. You may also specify optional arguments by setting Image::Info attributes in an associated
block.
Returns
self, or nil if the image format cannot be determined.
Example
Almost all of the examples call write.
Notes
When the argument is a filename, specify the output format via the filename extension (for example ".jpg" or ".gif") or by prefixing the filename with
the desired format (for example, "jpeg:myfile"), not via
format=.
Do not use a StringIO object or a Tempfile object as the argument. Neither of these work. Use to_blob to write to a String.
Instead of a tempfile, get the path of the tempfile from the path method. Prefix the path with the desired image format. For example,
temp = Tempfile.new("image")
img.write("jpeg:"+ temp.path)
See also
ImageList#write
Magick API
WriteImage


